One of two impressive and famous dams in the Derwent Valley. This is the lower dam that separates Derwent Reservoir and Ladybower Reservoir.
Paper options:
300gsm Ultimate Lustre. A premium heavyweight stock with satin finish.
310gsm Satin Photo Rag by Hahnemühle this beautiful acid free archival paper is made from 100% cotton with a very subtle satin finish.
Print only, no frame. Images are to show how the print looks in different coloured frames. The image has a white border with text set below.
If you have a particular size that you would like, please get in touch to discuss.

 Image 1 of 6
 Image 2 of 6
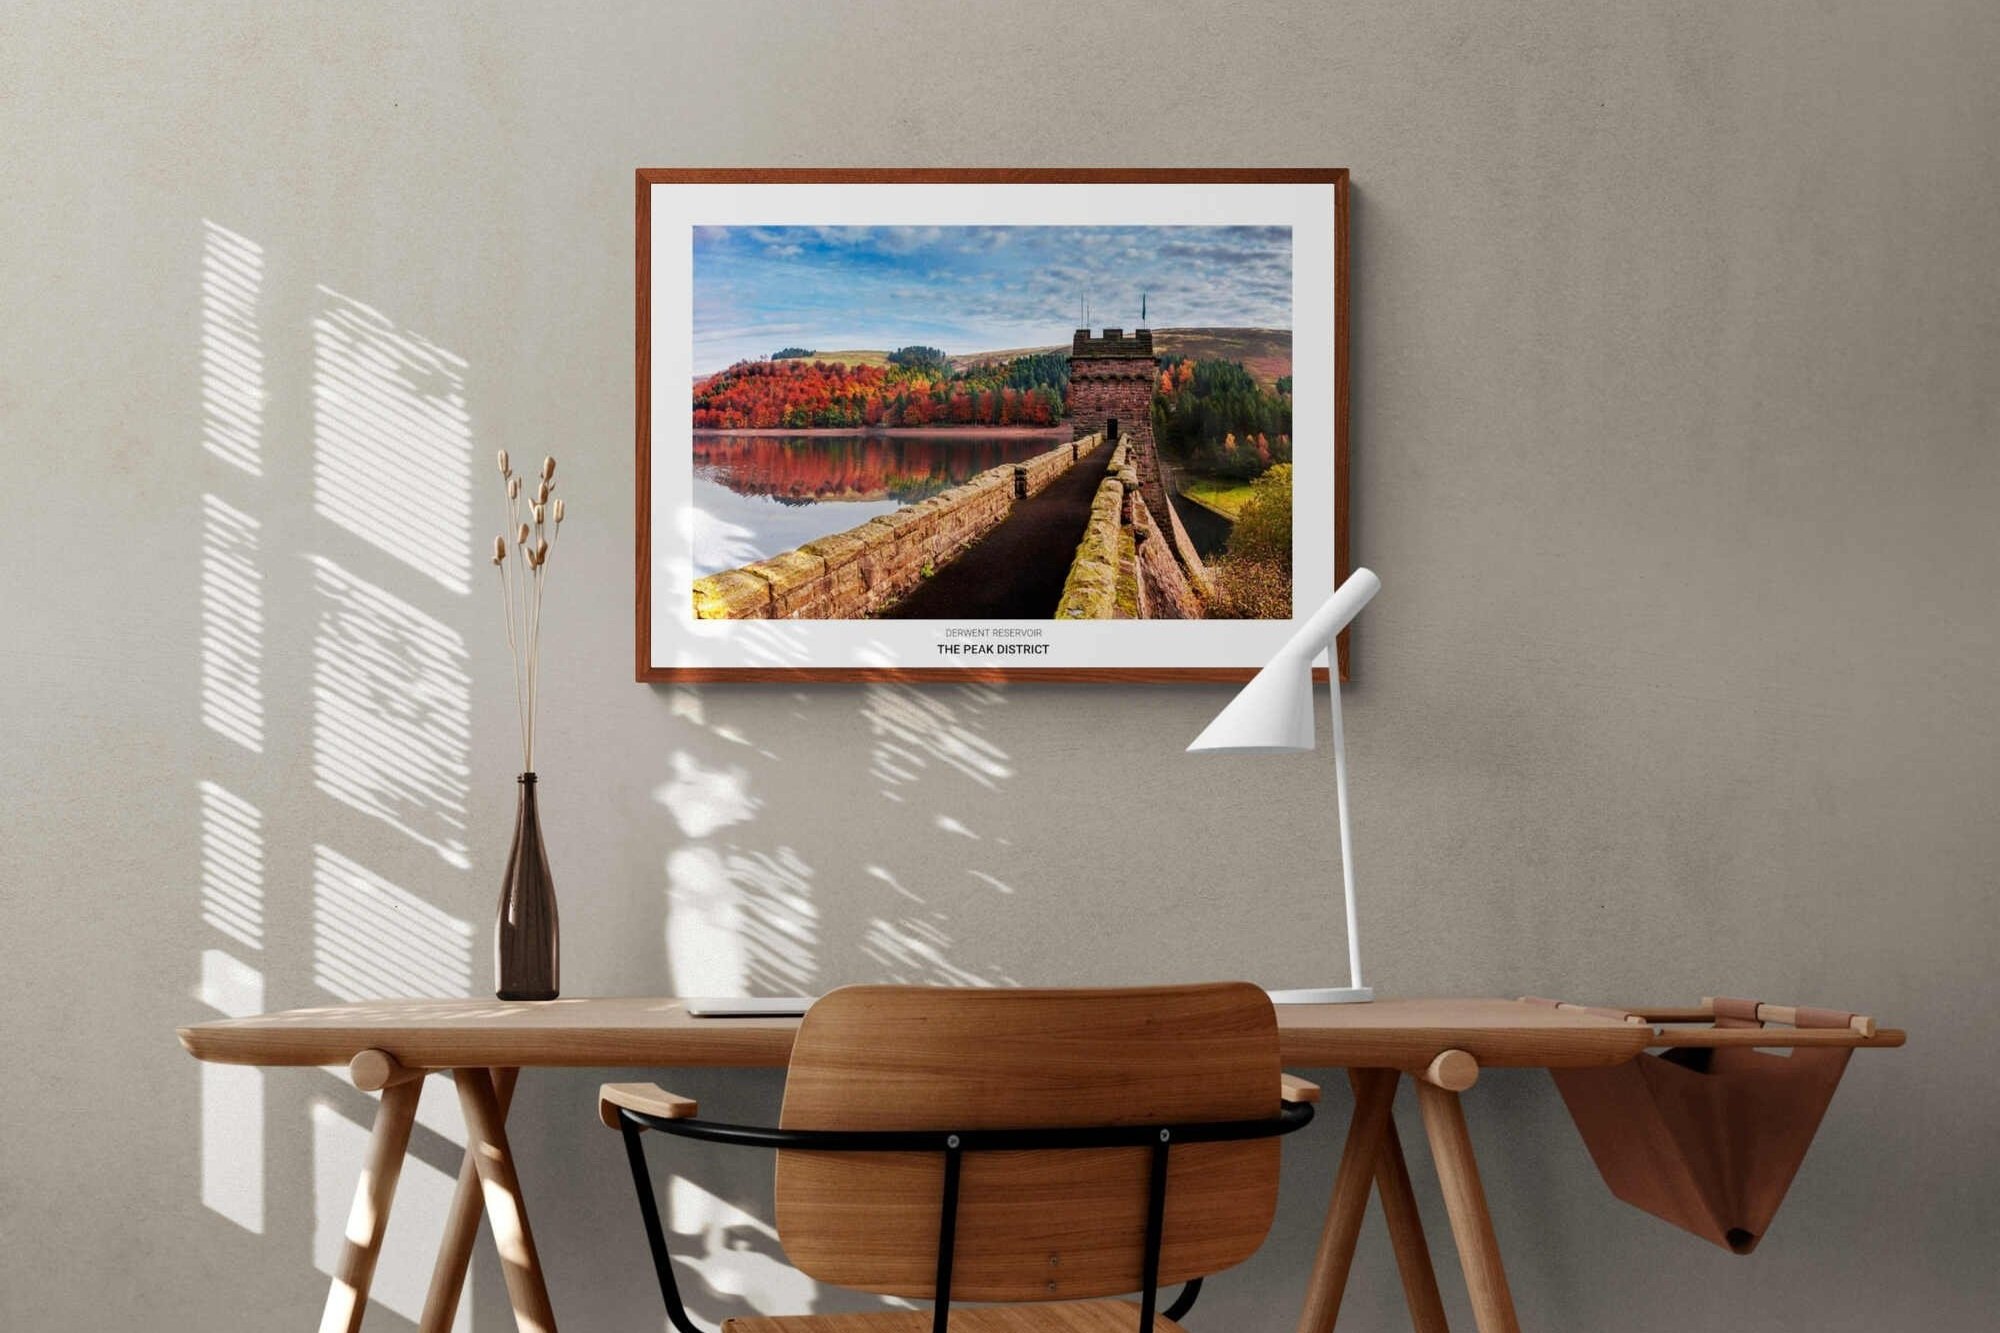 Image 3 of 6
 Image 4 of 6
 Image 5 of 6
 Image 6 of 6